Adding Twitter Link to Acumatica CRM Contact
Acumatica Customer Management (CRM) provides flexibility to add custom fields to link to social media that is important to your organization.
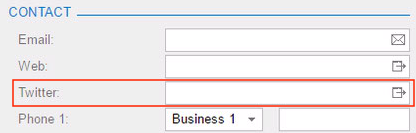
In this example we will add a user field to the database table CRContacts and the CRM Contacts screen to track the contact’s Twitter URL.
This post from the Acumatica Developer Network shows how to get started with customizations and create a customization project. The first half contains similar instructions and several screenshots.
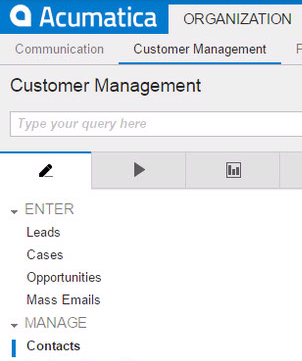
Instead of the screen shown that post, navigate to the Contacts screen (Organization > Customer Management > Work Area (the “Pencil” tab) > Manage > Contacts) and select a contact.
In the upper-right corner of the Contact page, click the Customization menu, then Inspect Element, then the “Web” text box. An Element Properties dialog appears. Click Customize, then “New…”. Enter a name for a new project, such as “SocialMedia”, then click “OK”.
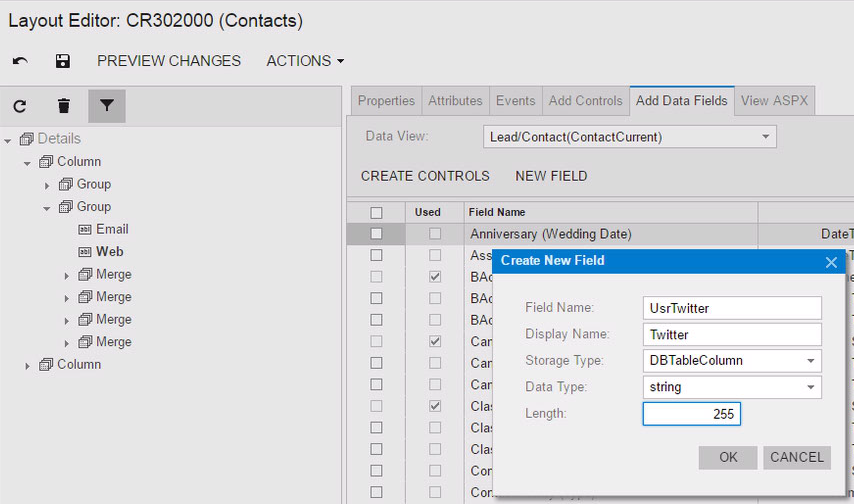
In the customization project, click the “Add Data Fields” tab, then “New Field”. Type “Twitter” as the Field Name and Display Name. Acumatica will prepend “Usr” to the Field Name when you tab to the Display Name. Then field should be stored in the database, “DBTableColumn”, as a 255 character string.
Click OK and Publish the current project. A Compilation panel appears. Wait until you see a message that the “Website has been updated”, then close it and reload the page.
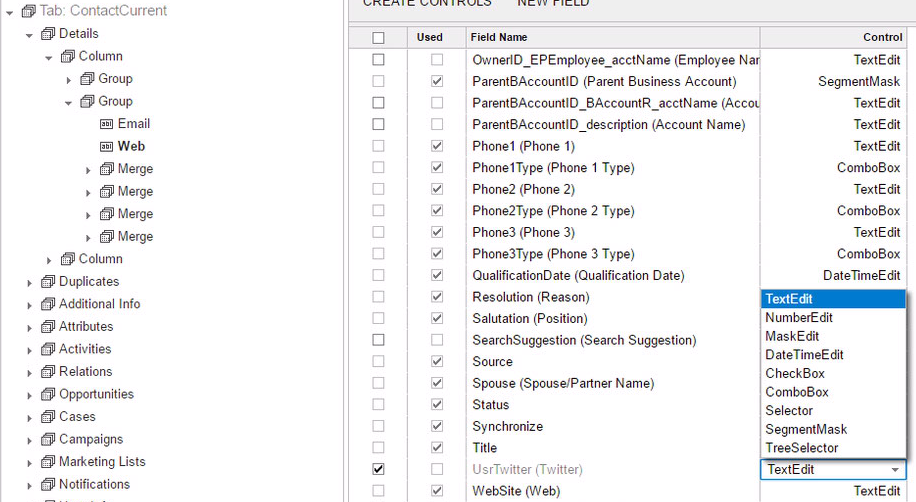
Next, you’ll need to create a control for the data field. The tree under the Layout Editor looks a little different after you reload. Expand Tab: CurrentContact > Details > Column > the second Group > then click “Web” so it’s highlighted. Then click the “Add Data Fields” tab again, scroll down and check the first column to the left of your new field “UsrTwitter (Twitter)”. You need to use the LinkEdit control, but it is not listed in the list in the Control column, so accept the default “TextEdit”. Click Create Controls.
The new Twitter control appears under the Web control. Click it, then the “Properties” tab, and edit the ID to “edTwitter” or something else that’s a bit more descriptive than the default name. Tab off, then click the Save icon to the left of “Preview Changes”.
You’ll need to edit the ASPX to change the type of control. Click Actions, then “Edit ASPX”. Search for “UsrTwitter”. Note the WebSite control just above it. The type of that control is PXLinkEdit. Change your new control from PXTextEdit to PXLinkEdit, then click Generate Customization Script.
![]()
Now you can preview the page. Click CR302000 under Screens, then Preview Changes. You’ll see your Twitter field with a link that looks just like the Web link above it. The final step is to Publish Current Project like you did before. Now you can start adding Twitter links for your contacts. Repeat this process to add links to Facebook, LinkedIn, and more.